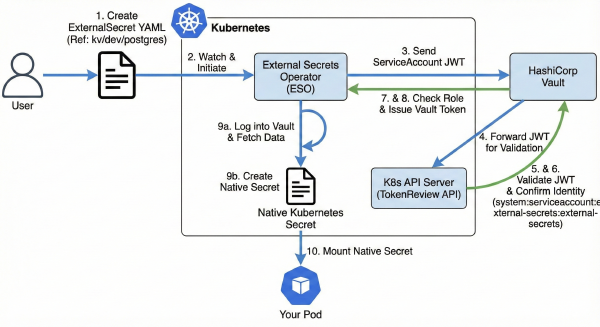
This is Part 4 of the Hashicorp Vault series. In Part 1, we bootstrapped Vault. In Part 2, we built our CI/CD pipeline. In Part 3, we finally killed the static kubeconfig.
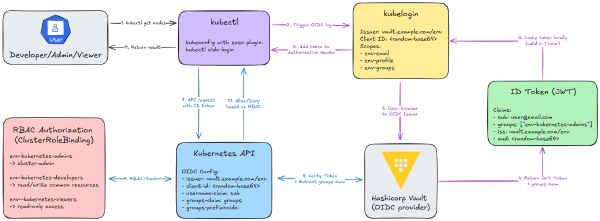
This is Part 3 of the Hashicorp Vault series. In Part 1, we bootstrapped Vault. In Part 2, we built the full CI/CD pipeline. Now, we’re solving the final, massive headache: getting secure, dynamic kubectl access.
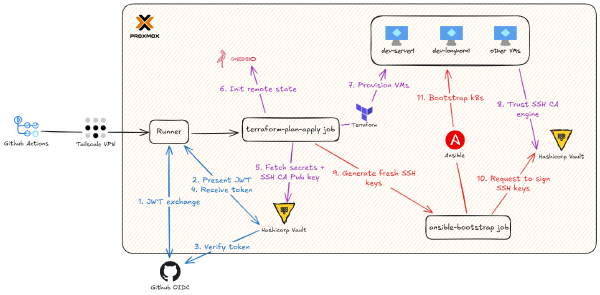
This is Part 2 of the Hashicorp Vault series. Part 1 covered bootstrapping and configuring HashiCorp Vault (the one-time terraform-admin work) and the design goals for Zero Trust secrets management.
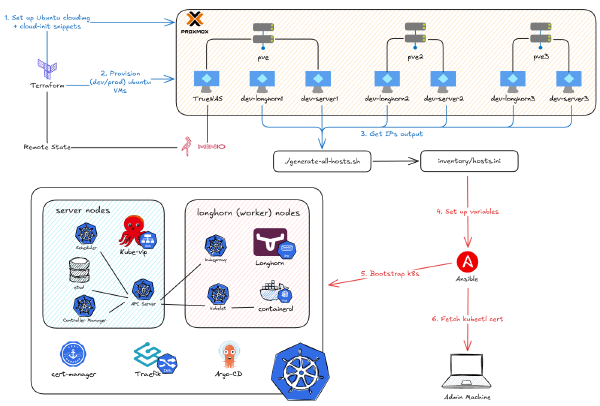
In the last two parts of the On-Premise 101 series, I showed you how to provision and bootstrap a full Kubernetes cluster. Now, I’m tearing part of it down and rebuilding the entire workflow. Why? The project’s goal was always automation, but I hit a wall. The manual steps to set up that automation - like managing secrets and SSH keys - became a huge liability.
People are often scared to learn Kubernetes because it’s difficult to set up an environment to play around with. Sure, you can use a project like minikube to learn on your own, but running it on your laptop seems limited, and you may not get to experience all the awesome features Kubernetes offers (remember, it was born for high availability). Or, if you have money, you can use a managed Kubernetes cluster from one of the cloud providers. Often, they’ve abstracted away so many things under the hood that you only need to learn kubectl and you’re good to go.
I’m the kind of person who will happily spend 10 hours building an automation script just to save 10 minutes of manual work every day. If that sounds like you, you’re in the right place.
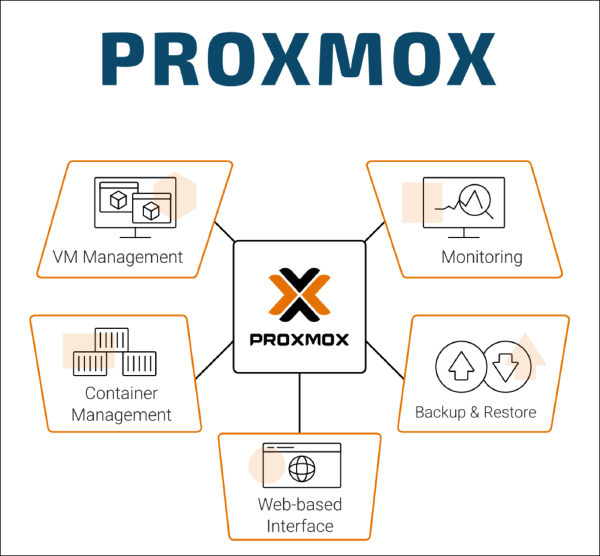
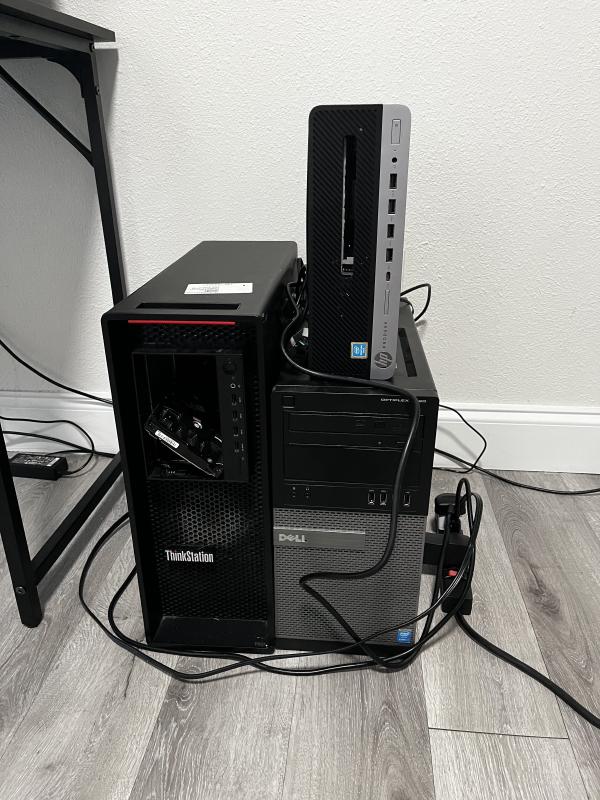
In the previous parts of this series, we went from a single hand-me-down PC to a full 3-node cluster, and then we installed Proxmox as our hypervisor. We even managed to pass through a GPU to a VM for near-native performance.
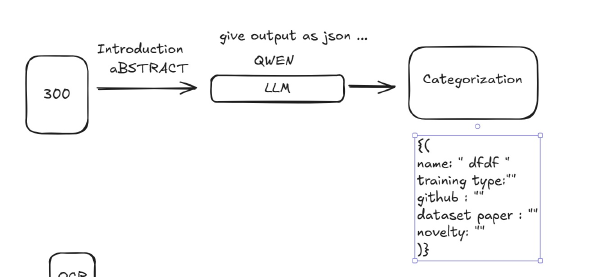
This is my story of how I attempt to build an AI-powered pipeline for ArXiv papers. It was a journey that started with a cool idea about AI agents and ended with me wrestling Docker, n8n, and Python into submission.
In the previous part, we covered how I started playing around with my hand-me-down computer and then escalated to building a whole 3-node cluster. It’s been a 3-year journey, and there have been so many changes to the software stack I host. But no matter what, there’s one thing I’ve used consistently from beginning to end: Proxmox (Hypervisor). So before we dive into how I deploy my applications on Docker or Kubernetes, I’ll show you the glue that connects the hardware we just built to all the software we’re going to deploy.
You might have heard about the recent AWS outage that caused many services to go down. To think that half of the internet relies on a single service is crazy, even if it might be the best in its field. The engineers at AWS have done many things to prevent this, such as high availability, multi-region, zones, etc., but if a critical part of it still goes down, the whole thing goes down too. Therefore, if you don’t want to give all your money and trust to a single company, you might want to explore the on-premise option, which is self-hosting.