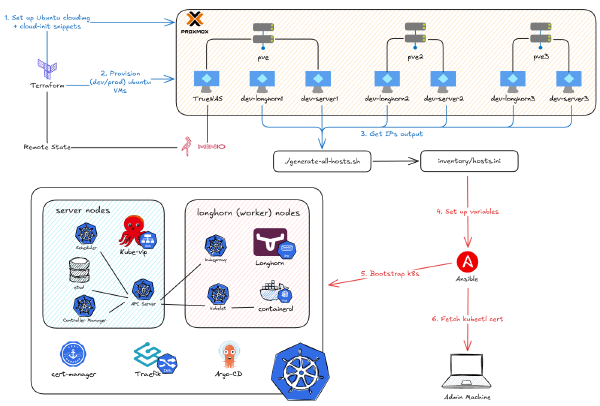
In the previous part, we covered how I started playing around with my hand-me-down computer and then escalated to building a whole 3-node cluster. It’s been a 3-year journey, and there have been so many changes to the software stack I host. But no matter what, there’s one thing I’ve used consistently from beginning to end: Proxmox (Hypervisor). So before we dive into how I deploy my applications on Docker or Kubernetes, I’ll show you the glue that connects the hardware we just built to all the software we’re going to deploy.
Why Proxmox? The Magic of Type 1 Hypervisors#
Many of you have probably heard the term Virtual Machines (VMs), the ones that programs like VirtualBox and VMWare create. Those programs, which are often called a Type 2 Hypervisor, let you basically run a whole Guest OS (i.e., Windows, Linux, …) on top of your current one (which is called the Host OS). Because it doesn’t actually use the machine’s hardware resources directly - it goes through a translation layer in the Host OS - it lets you do anything inside without worrying about the machine being compromised. Therefore, it’s frequently used for testing out dangerous programs like Honorlock online exam proctoring (oops, don’t arrest me prof Eggers). It runs fine with basic, lightweight programs, sure. But if you want to push it harder to run heavier ones, it might not utilize all the potential performance the machine has.

That’s where the Type 1 Hypervisor comes in. It can still create Virtual machines like above. But right now, notice it no longer has the Host OS between it and the Hardware resources. That means it can now directly access the full performance of the machine, without relying on the Host OS’s translation layer, making the Virtual machine running on top of it much more efficient. Maybe you don’t know this, but when you enable Windows Subsystem for Linux 2 (WSL2), Windows re-configures itself to run on top of its own Type 1 Hypervisor called Hyper-V. WSL2 then runs as a separate, lightweight VM directly on that same hypervisor, side-by-side with Windows, providing full system call compatibility. Other examples include VMWare ESX or ESXi, and notably, Proxmox.
Proxmoxis an open-source virtualization management solution that usesKVMto manage virtual machines andLXCto manage containers. It is aType 1 Hypervisorthat built on a Debian-based Linux distribution, and is managed through a central web interface for tasks like clustering, high availability, storage, and networking.
So that explains Proxmox. For me, the biggest benefit of using Proxmox was to easily pass through computer resources to bypass even the Hypervisor layer itself, eliminating significant overhead and allowing the VM to receive near-native hardware performance. This allows me to pass through a GPU into a VM to run inference on LLM models at the highest VRAM usage and computation; or pass through HDDs to a VM to use as a NAS (more on this in the next part). Additionally, as mentioned above, you get a beautiful web interface to manage the VMs and other useful features, so it has the potential to replace even Kubernetes or TrueNAS. However, I prefer specialization over convenience. I’d rather use a dedicated tool that does one job perfectly than a single, all-in-one tool that does multiple jobs just ‘okay’.

To demonstrate the ability of Proxmox, I will show you a guide to create a VM that is capable of directly inheriting a Nvidia GPU from the host machine, allowing the applications running inside the VM to utilize its fullest performance. However, note that this is just one of many examples you can do with Proxmox. In the next part, I will show you how to even virtualize a NAS device on it, or provision multiple VMs in one command.
Getting Started: My Proxmox Post-Install Toolkit#
I’m not going to cover the in-depth guide to install Proxmox as it’s similar to installing any other OS: just get the ISO file, burn it to a USB, turn off the computer, boot from the USB, and follow the installation guide (the default options are pretty solid). The settings they ask you to configure from the beginning can also be changed later after installation. So no need to be afraid of anything.
Next, I will show you commands that I actually use after installing Proxmox, as I believe they are really useful.
This script provides options for managing Proxmox repositories, including disabling the Enterprise Repo, adding or correcting PVE sources, enabling the No-Subscription Repo, adding the test Repo, disabling the subscription nag, updating Proxmox VE, and rebooting the system.
bash -c "$(curl -fsSL https://raw.githubusercontent.com/community-scripts/`Proxmox`VE/main/tools/pve/post-pve-install.sh)"
To create a new Proxmox VE Ubuntu 24.04 VM, run the command below in the Proxmox Shell. Note that if you want to use pass-through features like a GPU, you must select q35 as the machine type, host as the CPU type, and make sure not to start the machine after installation. In the cloud-init tab, change the username, password, network address, and SSH public key so you can SSH into it later.
bash -c "$(curl -fsSL https://raw.githubusercontent.com/community-scripts/`Proxmox`VE/main/vm/ubuntu2404-vm.sh)"

This script is fantastic because it creates a cloud-init template, which is much faster than manually installing from an ISO. It lets you pre-configure your username, password, and networking, so the VM is ready to go in seconds. It’s the perfect way to spin up new VM s quickly, especially when you plan to make more for a Kubernetes cluster later. If you want more useful scripts like this, feel free to hop over to here.
Passing a GPU to a VM#
Firstly, we don’t want the Proxmox host system utilizing our GPU(s), so we need to blacklist the drivers. I’m not gonna provide the whole full guide, as it’s a really long process and requires you to know your system to adjust accordingly. But here’s the ultimate guide that provides detailed explanations and steps for doing so.
Secondly, after we verify the GPU was passed through successfully, we need to set up the VM to receive it:
- After Ubuntu has finished installing and is reachable by SSH on your network, shut down the `VM and go to the “Hardware” tab.
- Click “Add” > “PCI Device”. Select “Raw Device” and find your GPU. Click the “Advanced” checkbox, “All Functions” checkbox, and “PCI-Express” checkbox, then hit Add.
- Start the VM again and type
lspciin the console. Search for your GPU. If you see it, you’re good to go!
Thirdly, we need to install the drivers inside the VM so that the software can utilize the GPU correctly. There are multiple ways to do this, but I always refer to this site to install.
sudo apt update && sudo apt install ubuntu-drivers-common
# List drivers
sudo ubuntu-drivers list --gpgpu
# Let’s assume we want to install the `570-server` driver (listed as `nvidia-driver-570-server`):
sudo ubuntu-drivers install --gpgpu nvidia:570-server
#You will also want to install the following additional components:
sudo apt install nvidia-utils-570-server
# After that, reboot your system
sudo reboot
# Once the machine is back up, check to be sure your drivers are functioning properly
nvidia-smi
Installing Docker (And Why I Use a VM, Not LXC)#
Note that Proxmox also has LXC, as an alternative to Docker. While LXC offers better performance, the software support and ease of use aren’t as good as Docker. Not to mention it is harder to pass through a full physical device (like a GPU) to an LXC container, because by design, it’s tightly integrated with the host kernel.
Therefore, I only use LXC for critical software that needs to stay active alongside the machine, such as Tailscale or Cloudflared. For most other things, I use a VM with Docker to experiment and test. If you want to install Docker and Nvidia Container Toolkit on the VM to help containers leverage your GPU, you’ll want to run these commands:
# Add Docker's repostiory to apt sources
sudo apt-get update
sudo apt-get install ca-certificates curl gnupg
sudo install -m 0755 -d /etc/apt/keyrings
curl -fsSL https://download.docker.com/linux/ubuntu/gpg | sudo gpg --dearmor -o /etc/apt/keyrings/docker.gpg
sudo chmod a+r /etc/apt/keyrings/docker.gpg
echo \
  "deb [arch="$(dpkg --print-architecture)" signed-by=/etc/apt/keyrings/docker.gpg] https://download.docker.com/linux/ubuntu \
  "$(. /etc/os-release && echo "$VERSION_CODENAME")" stable" | \
  sudo tee /etc/apt/sources.list.d/docker.list > /dev/null

## Add Nvidia Container Toolkit's repostiory to apt sources
curl -fsSL https://nvidia.github.io/libnvidia-container/gpgkey | sudo gpg --dearmor -o /usr/share/keyrings/nvidia-container-toolkit-keyring.gpg \
  && curl -s -L https://nvidia.github.io/libnvidia-container/stable/deb/nvidia-container-toolkit.list | \
    sed 's#deb https://#deb [signed-by=/usr/share/keyrings/nvidia-container-toolkit-keyring.gpg] https://#g' | \
    sudo tee /etc/apt/sources.list.d/nvidia-container-toolkit.list

## Install
sudo apt-get update
sudo apt-get install -y docker-ce docker-ce-cli containerd.io docker-buildx-plugin docker-compose-plugin
sudo apt-get install -y nvidia-container-toolkit

# Use docker without sudo, need to log out then back in to apply this
sudo usermod -aG docker $USER

# Configure the container runtime by using the nvidia-ctk command and restart docker
sudo nvidia-ctk runtime configure --runtime=docker
sudo systemctl restart docker
After successful installation, this will test to make sure that the NVIDIA container toolkit can access the GPU correctly.
sudo docker run --rm --runtime=nvidia --gpus all ubuntu nvidia-smi
# You should see the same output as running nvidia-smi without Docker.
Summary & What’s Next: Prepping for TrueNAS#
And that finishes the whole step of setting up a VM on top of a Type 1 Hypervisor to use an Nvidia GPU with near-native performance. Now you can go ahead and install any Docker containers you want.
But I’m not doing that right away, because I want those containers to use NFS storage. That way, even if the VM stops working correctly, I can still spin up a new one without losing my persistent application data. This approach is also helpful if you want to migrate from Docker to Kubernetes, as it allows you to reuse the data by just pointing to the correct NFS path. To do this, we have to set up TrueNAS, a network-attached storage platform.